
Muon is a decentralized network of nodes with limitless scalability. Since it is not on a chain and does not store data permanently, it is free from the "save state" restrictions.
By using Muon any application web3 can use external data, confident in its validity, security and almost instantaneous response.
Muon Decentralized Autonomous Nodes work like a VPS (virtual private server) and can therefore run anything that can be run on a Linux server.
Server requirements:
The easiest server 350 rub. VPS Himalia (rented here)
1. First, let's update the kernel of our Ubuntu operating system:
sudo apt-get update && sudo apt-get upgrade -y2. Next, you need Docker to install the node:
wget https://raw.githubusercontent.com/NodeRunTeam/NodeGuide/main/docker.sh && chmod +x docker.sh && ./docker.sh3. After installing Docker, create a folder for the node (each command separately):
mkdir muon-nodecd muon-node
4. After all the manipulations, download the Docker-compose file of our node:
curl -o docker-compose.yml https://raw.githubusercontent.com/muon-protocol/muon-node-js/testnet/docker-compose-pull.yml5. Run the node:
docker compose up -d6. Then we check our node through the browser.
We execute the command and follow the link that was issued:
echo http://$(wget -qO-eth0.me):8000/status7. Check if there is data and leave the page open (we will need data from it later, namely: Address and peerId):

8. Next, we need to go to link and connect the MetaMask wallet. This wallet will be linked to the node.
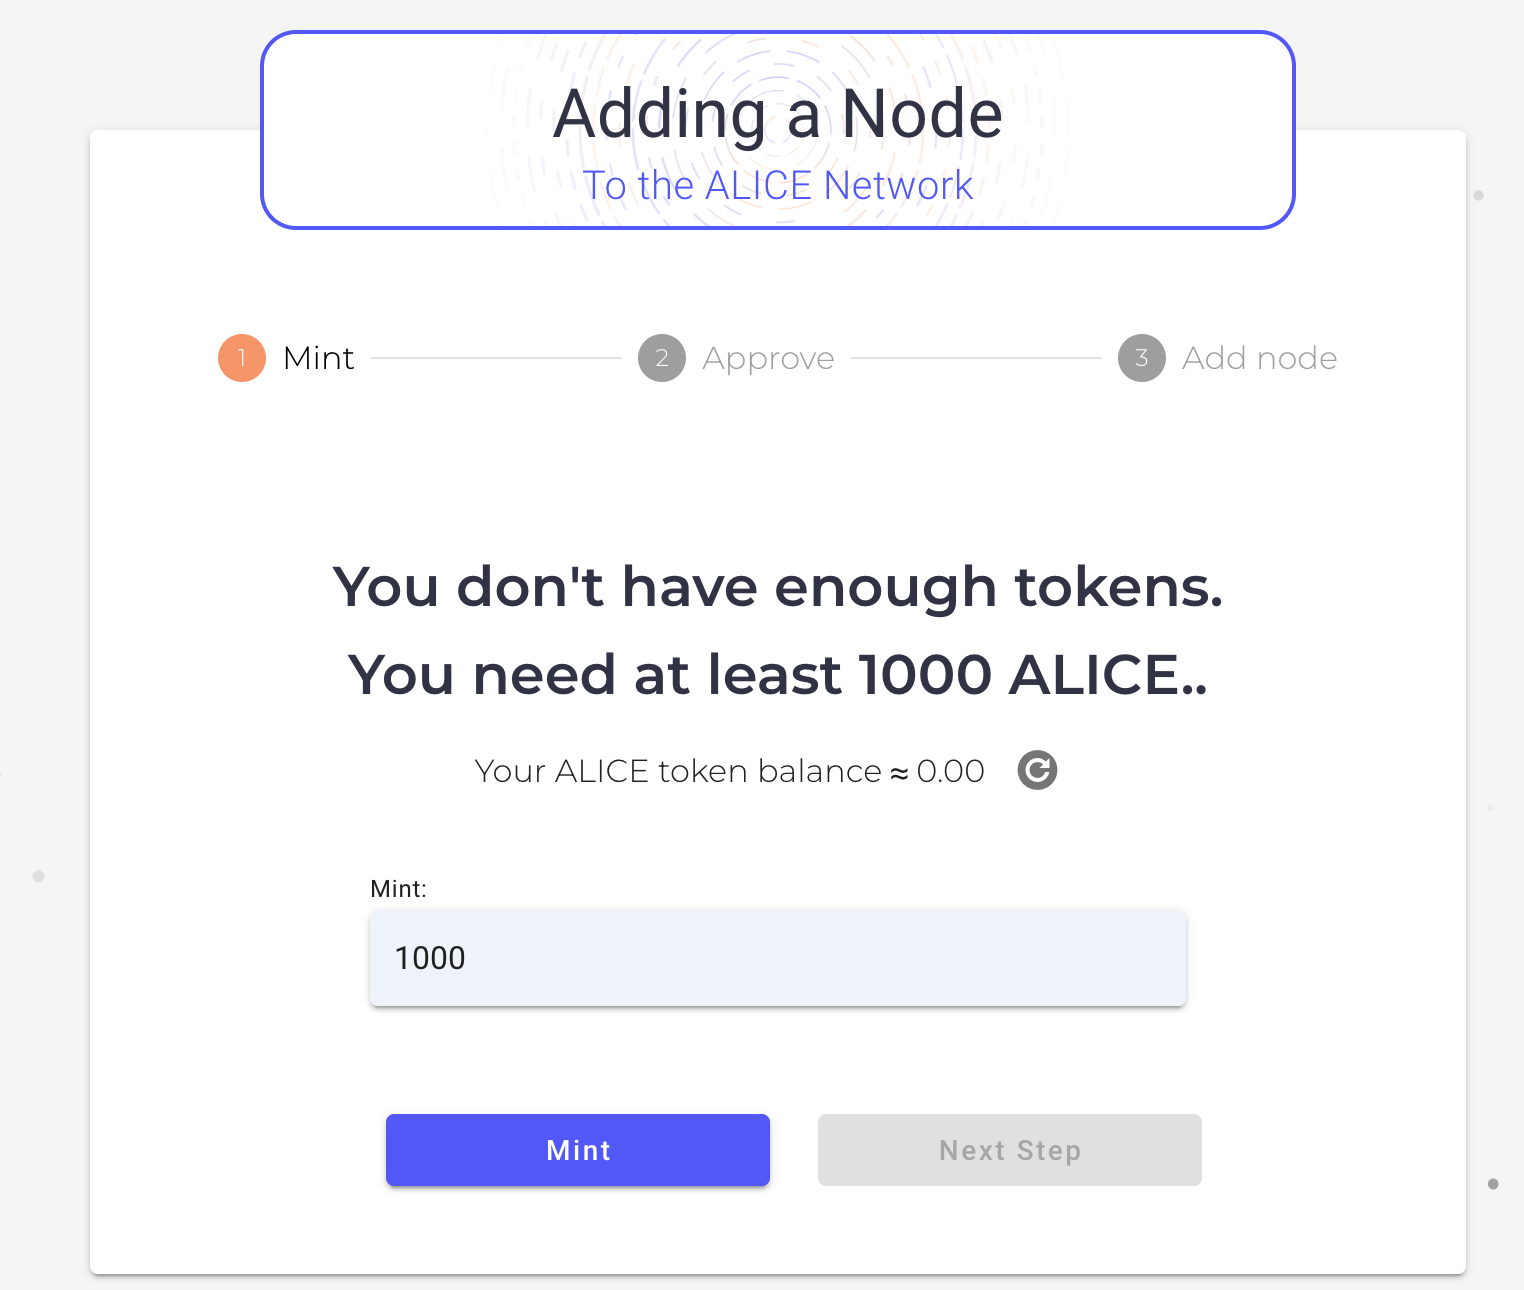
9. Next you need to mint at least 1000 Alice on the BSC Testnet. If you do not have test BNB tokens, then go to tap and request tokens for transactions.
As soon as the tokens arrive, we return to the previous page and mint at least 1000 ALICE.
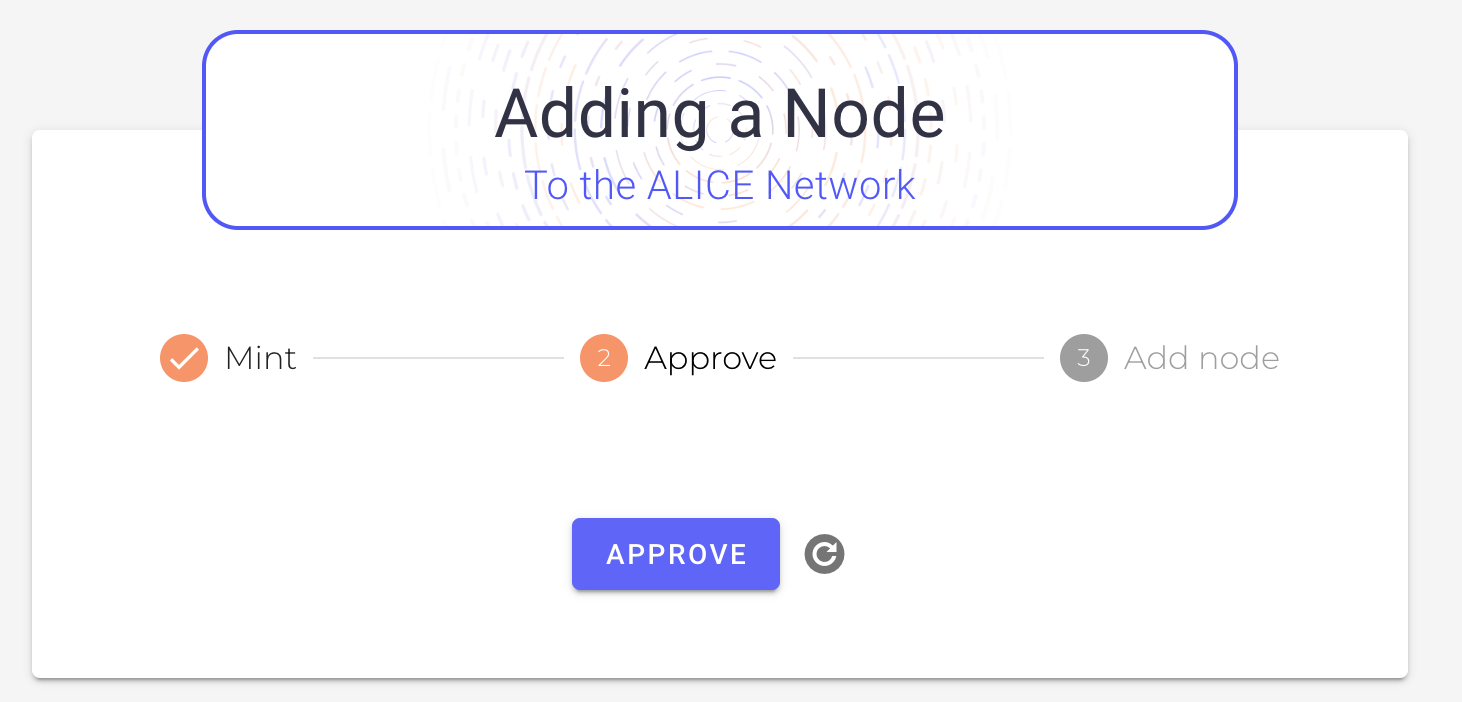
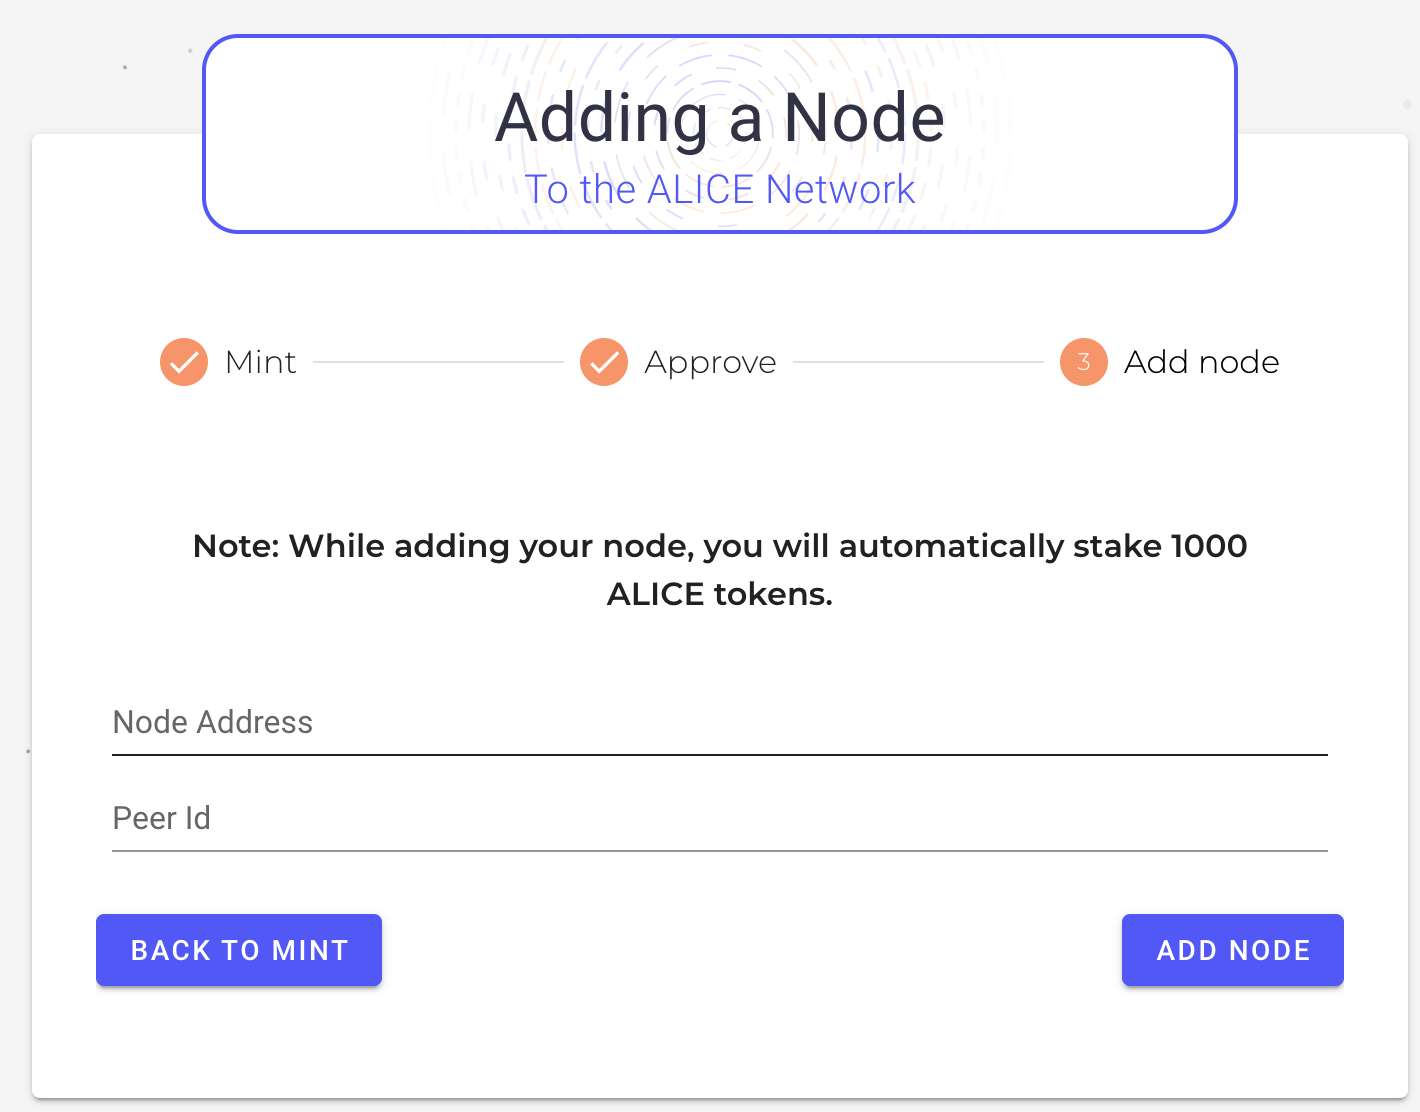
10. Add AlICE tokens to our node. They are automatically sent to staking. Confirm the transaction with the Aprove button:
11. Next, you need to enter the Node Address and Peer Id, we take the data from the page where step 6 was performed.
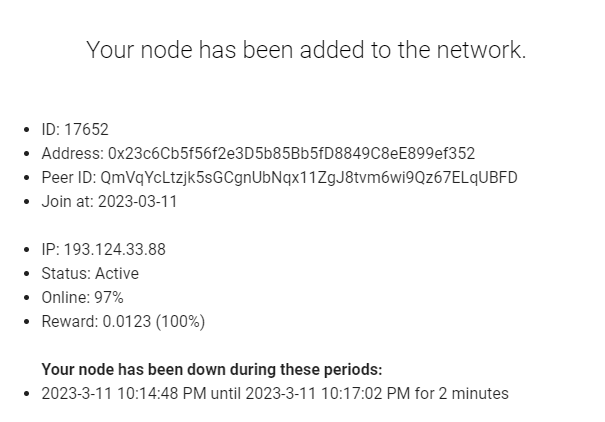
12. This completes the installation of the Muon node! After a while, the rewards will start to drip.
Developers advise to make a backup of the node, so after activation, do this:docker exec -it muon-node ./node_modules/.bin/ts-node ./src/cmd keys backup > backup.json
A backup.json file will appear in the directory with the node files. If you use MobaXterm you can save it to your computer.
To restore a node from Back-up follow official instructions.
You can also see how to install a node Shardeum.