
Shardeum — it is an EVM-based Layer1 that can increase TPS throughput with each validator added to the network, ensuring low cost gas forever.
If you think that the project has no money, then you are mistaken, it is known that the project collected 18 million $ from Spartan Group, Foresight Ventures, Big Brain Holdings, Digital Finance Group and others.
The other day Shardeum announced the launch of the final testnet Sphinx, which is final before starting mainnet.
In our chat More than once we talked about activities, but this time we decided to jump into the last car with rewards and install a node for which there will be a reward.
Server rental:
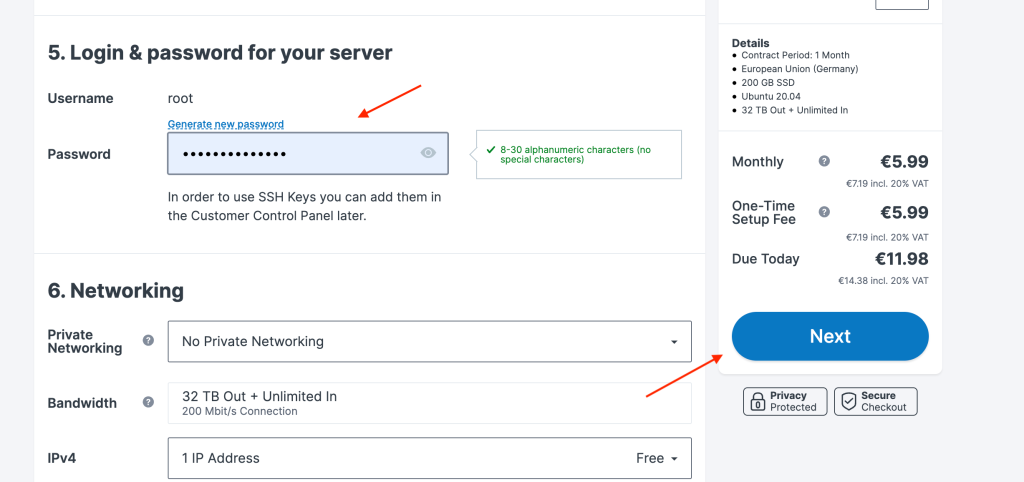
The Shardeum team provided the specifications for the node: 4 CPUs, 8 GB RAM, 200 GB SSD and ubuntu 20.04 operating system.
We recommend renting a server on Contabo websitebecause the price and quality match.

In this screenshot, we have indicated a server that is perfect for a node, but there is one thing: the price, which is written in large numbers, is the price of rent per month. And the price of the first month of buying a server will be different, in our case 14-16 euros.
Before buying, register on the site and be sure to remember the password, it will come in handy! After registration, we return to the site and select "Select".
We don’t change anything on the new page, since everything fits the standard one and we find the item that is shown below in the screenshot and enter the password for your cantabo account.
Our next step will be to enter our data on the site:
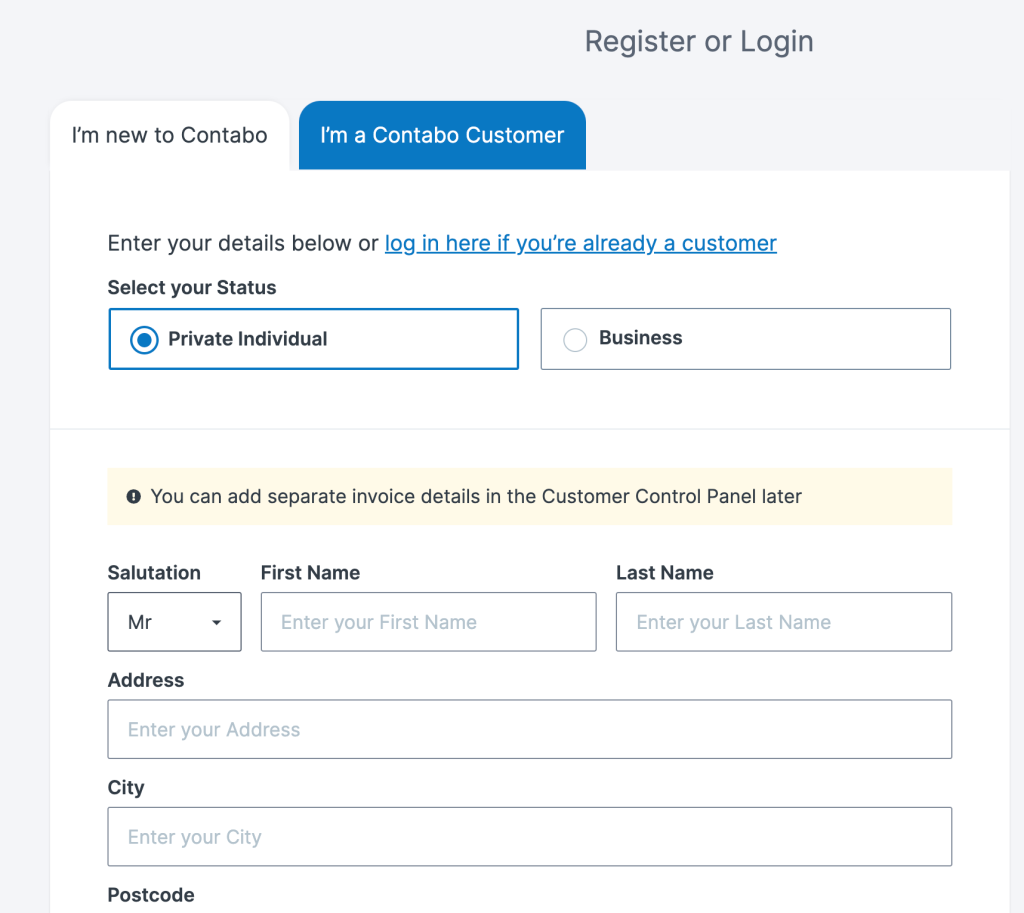
After successful entry and confirmation, we are transferred to the payment site, where you need to enter the card details and proceed to the final amount of the server payment:

We pay for the server and get the following result:
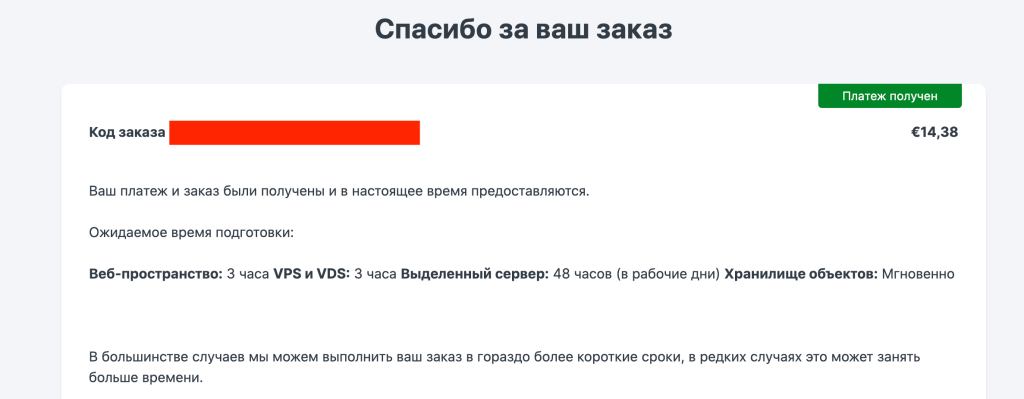
As we can see on the screenshot, the expected preparation time takes 3 hours, but in practice, in 10-20 minutes you will receive an email with your details of the server that you rented.
Preparing our PC ( Windows, Mac )
For Windows, download a program called MOBA x term, for MAC — Termius. We will look at an example through a MAC, but through Moba everything is easy and simple ...
Termius: launch the application in the Hosts section and select ADD and New Host.

In the right part of the application, fill in the information: in the Adress line, indicate the IP that came to your mail (the first line in the table), write the name and press the arrow.

After creating the server, right-click, select Connect And With SSH. That's all, we connected remotely to our server.
Node installation.
- We write the first command to install curl :
sudo apt-get install curl
- Updating packages:
sudo apt update
- Install Docker:
sudo apt install docker.io
- Installing docker-compose ( copy the full command ) :
sudo curl -L "https://github.com/docker/compose/releases/download/1.29.2/docker-compose-$(uname -s)-$(uname -m)" -o /usr/local/ bin/docker-compose- Grant permissions for docker-compose:
sudo chmod +x /usr/local/bin/docker-compose - Copy the command to download and install the validator:
curl -O https://gitlab.com/shardeum/validator/dashboard/-/raw/main/installer.sh && chmod +x installer.sh && ./installer.sh
- After that, the terminal will ask you questions, which we answer in order to set up your web dashboard:
Do you want to run the web based Dashboard? (y/n): y - We invent and set our password (the password is NOT displayed, but it is):
Set the password to access the Dashboard: - Add a custom port for the dashboard or the usual 8080 (just press Enter ):
Enter the port (1025-65536) to access the web based Dashboard (default 8080):
- Specify a custom directory or just click Enter for default install:
What base directory should the node use (defaults to ~/.shardeum):
- After installation, the end result looks like this:

- Open the validator CLI:
cd .shardeum - Run CLI validator:
./shell.sh - Open the validator GUI:
operator-cli gui start
We are waiting for the download to finish and after that we leave Termius.
Now we enter in the browser line (Chrome): https:// your IP address: 8080/. Instead of "Your IP address" we substitute the address of your server that came to the mail.
Chrome browser usually gives an error "Connection is not secure", but don't worry, feel free to press "Additionally" and choose "Go to website".
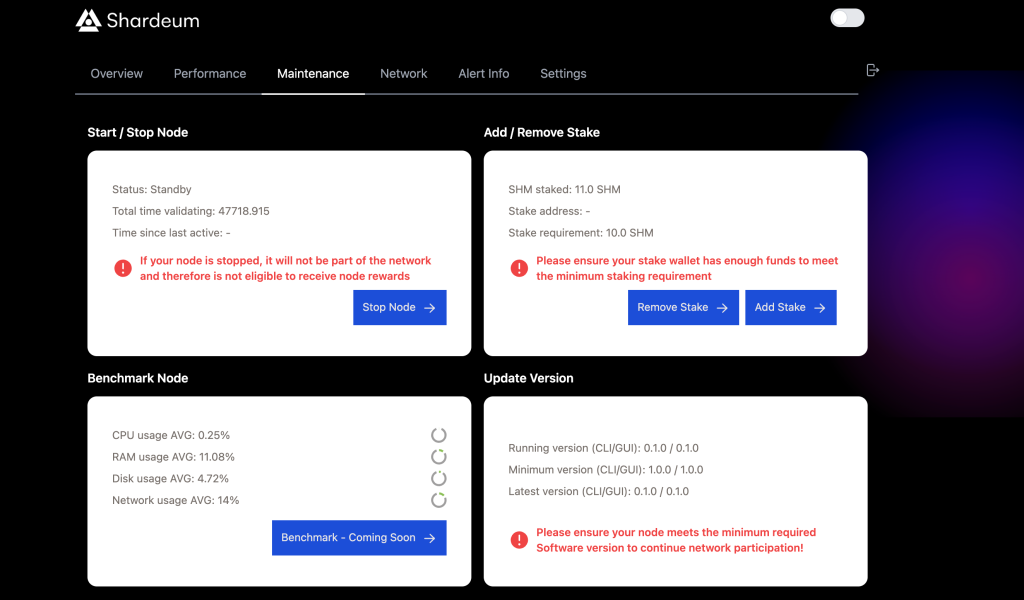
We enter the password that we wrote when installing the node, switch to the Maintenance tab and see something like this window:
- Press start node and reload the page. Status should change to Standby.
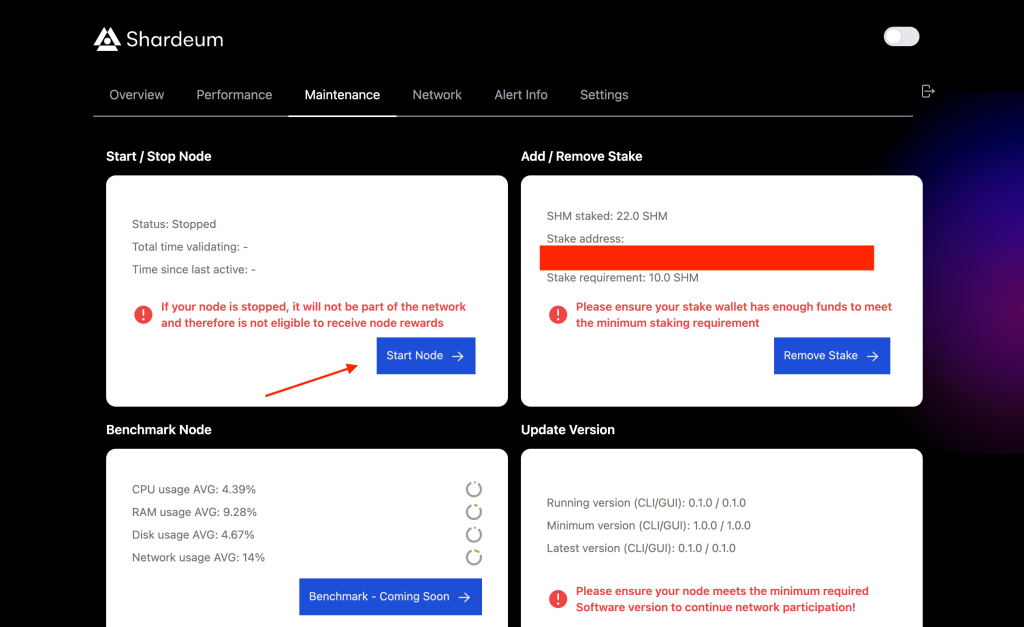
Next, you need to send SHM coins to stake.
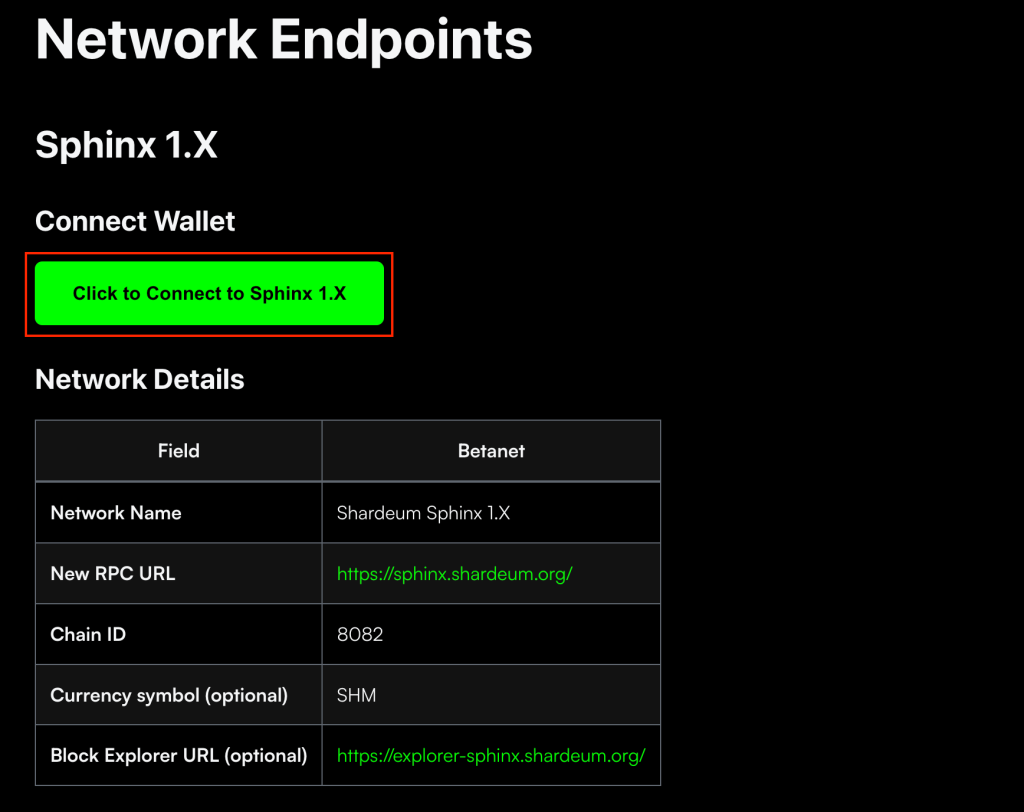
On the official website add the Sphinx 1.X network to MetaMask.
To get test SHM tokens, you can use the faucet at twitterand also, faucet in Discord, section faucet 1.0. From each tap, you can get 15 SHM every 24 hours.
After receiving the tokens, we return to the Shardeum website where we launched the node and in the next section we connect the Metamask wallet ( section maintenance, column Add/Remove Stake ).

After connecting MM, we stake our test SHM tokens (conditions from 10 tokens and more). The end result should look like this:
Author: Igor EvG